


Expert Mini Split Installation in Carmichael, CA
For homeowners in Carmichael seeking an efficient and flexible heating and cooling solution, a ductless mini-split system offers precise comfort control without the need for extensive ductwork. Mini-split AC repair and ductless heating systems provide targeted temperature regulation for individual rooms or zones, making them ideal for additions, converted spaces, or older homes where installing traditional ductwork is impractical or costly.
Installing a mini-split system is a specialized process that requires technical expertise to ensure optimal performance, energy efficiency, and longevity. From selecting the right system size to determining the best placement for indoor and outdoor units and making precise connections, professional installation is key to unlocking the full benefits of your investment.
Understanding Ductless Mini-Split Systems
Ductless mini-splits consist of two main components: an outdoor unit and one or more indoor units. These units are connected by a small conduit that houses the power cable, refrigerant tubing, and condensate drain line. Unlike central HVAC systems that distribute conditioned air through ducts, each indoor unit in a mini-split system delivers heating or cooling directly into the room it serves.
This design allows for zoning, meaning you can independently control the temperature in different areas of your home. This not only enhances comfort but can also lead to significant energy savings by only conditioning the spaces you are actively using.
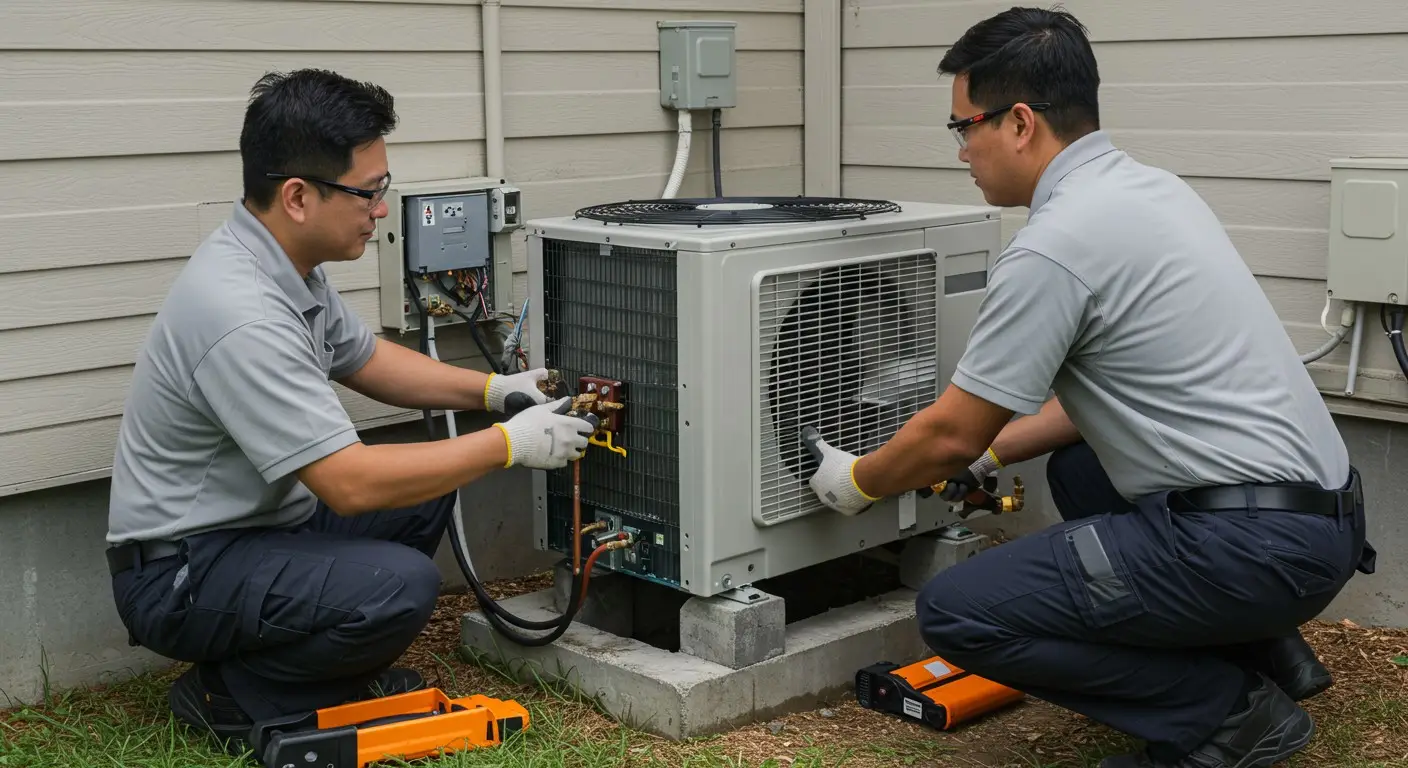
The Professional Mini-Split Installation Process
Installing a mini-split system in your Carmichael home involves several critical steps, each requiring careful planning and execution by trained technicians.
Initial Consultation and Sizing
- Assessment: The first step is a thorough assessment of your home's layout, square footage of the areas needing conditioning, insulation levels, window types, and local climate considerations specific to Carmichael. This assessment helps determine the appropriate size (BTU capacity) and number of indoor units required to effectively heat and cool your desired zones.
- Proper Sizing: Proper sizing is crucial; an undersized system won't keep the space comfortable, while an oversized system can cycle on and off too frequently, leading to inefficiency, humidity issues, and premature wear.
- Comfort Needs: During the consultation, technicians discuss your specific comfort needs and suggest optimal locations for the indoor and outdoor units, considering aesthetics, accessibility, and performance factors.
Selecting Indoor Unit Placement
- Unit Types: Indoor units, often wall-mounted but also available in floor-standing, ceiling-recessed, or ceiling-cassette styles, are placed in the zones that need heating or cooling.
- Air Circulation: Technicians carefully select locations that ensure good air circulation throughout the room while remaining aesthetically pleasing and easily accessible for maintenance.
- Proximity: Proximity to an exterior wall is often preferred to simplify the connection to the outdoor unit, but longer line sets are possible if necessary.
Positioning the Outdoor Unit
- Placement: The outdoor unit, which houses the compressor and condenser, needs to be placed on a stable, level surface, typically a concrete pad or wall brackets.
- Airflow: The location must allow for adequate airflow around the unit and be free from obstructions like shrubs or fences.
- Accessibility: Technicians also consider minimizing noise impact and ensuring the unit is accessible for future ductless AC repair or maintenance. Proximity to the chosen indoor unit(s) is a factor, but the connecting line set allows for flexibility in placement.
Creating Penetrations and Running Lines
- Penetrations: Small holes are drilled through the exterior wall to allow the conduit containing the refrigerant lines, power cable, and condensate drain line to pass from the indoor unit to the outdoor unit.
- Sealing: The size of the penetration is minimized and sealed effectively to prevent air leaks and maintain the home's envelope integrity.
- Line Set: The line set is then carefully run, often concealed in a protective cover along the exterior wall for a neat appearance.
Connecting Refrigerant Lines, Electrical, and Drainage
- Refrigerant Lines: This is a highly technical step. Refrigerant lines are cut, flared, and securely connected between the indoor and outdoor units. Proper vacuuming of the lines is essential to remove any moisture or non-condensable gases, which can severely impact system performance and lifespan.
- Electrical: Electrical connections are made to power both the indoor and outdoor units, requiring knowledge of electrical codes and safe wiring practices. A dedicated circuit is typically required for the system.
- Drainage: The condensate drain line is routed from the indoor unit to a suitable drainage point, ensuring that moisture removed from the air during cooling can properly exit the system, preventing potential water damage or mold growth.
System Charging and Testing
- Charging: Once all connections are made, the system is charged with the correct type and amount of refrigerant.
- Testing: Technicians then perform a series of tests to ensure the system is operating correctly. This includes checking refrigerant pressure, verifying electrical connections, testing temperature output in each zone, and confirming that the condensate drain is functioning properly.
Final Walkthrough and User Education
- Walkthrough: A professional installation concludes with a walkthrough with the homeowner.
- Education: The technician explains how to operate the system using the remote control or wall thermostat, how to change filters, and basic maintenance requirements.
- Questions: They will answer any questions and ensure you are comfortable using your new mini-split system.
Benefits of Professional Mini-Split Installation
While DIY kits exist, the complexity of connecting refrigerant lines, handling electrical wiring, and ensuring proper system sizing and charging makes professional installation highly recommended.
- Optimal Performance: Correct sizing and installation ensure your system runs efficiently, providing consistent comfort and using less energy.
- System Longevity: Proper installation techniques, such as correctly vacuuming and charging refrigerant lines, prevent common issues that can lead to premature system failure.
- Warranty Compliance: Most manufacturers require professional installation by certified technicians to validate the system's warranty. Incorrect installation can void your coverage.
- Safety: Handling refrigerant and electrical components can be hazardous. Professionals have the training and tools to perform the installation safely.
- Code Compliance: Professional installers are knowledgeable about local building codes and permits required for HVAC installations in Carmichael, ensuring your system meets all regulatory requirements.
- Troubleshooting: Experienced technicians can identify and address potential issues during installation, preventing problems down the line.
Choosing professional mini-split installation ensures that your system is correctly sized, properly installed, and performs reliably for years to come, maximizing your comfort and energy savings in your Carmichael home.
Ready to Restore Your Drains? Connect with Us Today!
Don’t let drain or sewer issues disrupt your Artesia home any longer. Whether you need fast repairs, preventative maintenance, or expert advice, our friendly team is ready to help. Contact us to schedule service or request a free estimate.
We also invite you to see why thousands of homeowners trust Royalty Heating & Air, read our customer reviews and discover the difference our commitment to quality and professionalism makes. Be sure to ask about our current special promotions and flexible financing options to make your plumbing repairs even more affordable.
Your comfort and peace of mind are just a call or click away!
Protect your HVAC
system today

Get in Touch
services? Contact us!

